Faro Arm Edge
Measurement Services
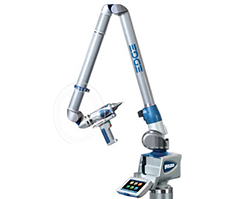
Naherco has the FARO Arm, which can measure, verify parts and tooling up to 4.7 meters in place, comparing the points taken against the CAD model, delivering an accurate dimensional analysis quickly and easily, FARO Arm capabilities are fundamental to this process. This arm applications include
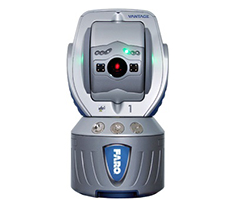
The FARO Laser Tracker is a device that solves the portable coordinate measurement, an extremely accurate long range device to measure parts up to 160 meters, its utility does not stop at the measurement, it can be put on quality control, inspection of parts that arrive at the factory or are about to leave the production line.
inspection, dimensional analysis and reverse engineering in all industries.
3D Scan
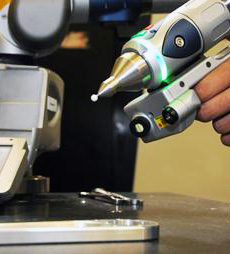
Fragile, complex and free-form surfaces can be captured as a dense and detailed 3D point cloud by the FARO ScanArm and Laser Scanner, allowing users to perform non-contact, 3D inspections with ease.
Non-contact 3D scanning from FARO can digitize features such as flush and gap that are difficult to inspect with contact methods. Laser scanning for 3D documentation can be a faster method of verifying many features and dimensions and it produces a more comprehensive and easier-to-read report.
3D Modeling
Naherco supports companies providing solutions to this problem, bringing major benefits to the reverse engineering services, the company uses the Geomagic Design X software for the 3D model of the part at issue, shortening the time of its engineering to 90%.
Naherco engineers use Geomagic Design X to make faster reverse engineering, scanning the part and working directly with the cloud of points captured, this information directly becomes a model to open in software like SolidWorks, Creo, Autodesk Inventor, NX, etc. in order to keep the updated design of the piece.
Reverse Engineering

Providing a way to generate missing CAD files and update or create as-built documentation, reverse engineering allows users to quickly digitize a part or object and create a fully surfaced CAD model which can then be used to reproduce an item.
Using non-contact 3D laser scanning, FARO’s portable CMM and 3D documentation solutions integrate 3D modelling processes into a single step. FARO’s non-contact measurement solutions are ideal for a multitude of reverse engineering applications including the development of virtual simulations of automotive interiors, rapid prototyping in plastics manufacturing and composite surface inspections in aerospace assembly.
Location
Av. Francisco Javier Mina 23 Col. Mariano Abasolo, Mexicali, B.C., MX
info@naherco.com
Phone
Phone: (686) 120-4089
Phone: (686) 120-4089
